Joint marker placement
This is best performed with the rider on the bike. Before beginning to place the markers:
- Explain to customer that you will be placing markers on their joints so some physical contact will be required (this should also be explained in pre-fit material).
- If the rider is wearing a loose shirt you may need to ask them to tuck it into shorts to avoid obscuring the hip marker
- Watches will often need to be removed also
- Communicate throughout the process and avoid unnecessary contact
- The marker locations are generally intended to be on the bones at the centre of joint rotation.
There are 8 marker locations:
- Toe
- Heel (optional)
- Ankle
- Knee
- Hip
- Shoulder
- Elbow
- Wrist
The same joints are marked for each of the position styles the system supports (Road, MTB and Triathlon) although the placement on hands and elbow may differ.
Marker Tape
Velogicfit marker tape is supplied in rolls of 100. The markers utilize night vision technology based reflective powder printed on to standard kinesiology tape. The tape can be cut with any pair of sharp scissors, we supply a set of scissors that are designed specifically for cutting kinesiology tape to avoid sticky residue but it is not compulsory to use these. The marker tape is not reusable. It is worth noting that the software uses both the reflective marker and some area of the surrounding tape for the analysis so it is not recommended to cut the tape down to only the diameter of the marker. It is sufficient to leave the tape as a rough square. Note that newer tape is blue and is pre-cut into squares, making the application process faster.
It is theoretically possible to use any 25mm diameter retro reflective marker. We tested extensively during the development of the software and could not find anything that performed as well as our prototype tape, which is why we recommend the tape instead of a generic alternative.
Toe: 5th Metatarsal Head
Palpate the outer side of the riders foot (just above the pedal axle is a good place to start) to find the most prominent bony protrusion. Place the marker here, slightly oriented to the upper side of the shoe so it is not pointing down.
Heel
The heel marker is optional; if you include it, you need to set the dropdown in the camera settings to Eight:
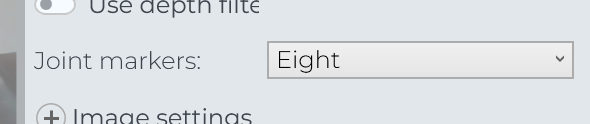
We recommend that you do include this marker, because it allows the calculation of more accurate ankle flexion metrics.
The placement of this marker should be :
- Towards the back of the shoe, but not so far around the heel that the camera can't see it
- At the same height above the sole as the toe marker
- There should be some "margin" (visible tape around the reflective dot), especially below the dot. Don't put it right on the edge of the bottom of the shoe.
Ankle: Lateral Maleolus
Place a thumb and finger either side of the bony protrusion of the ankle. Centre the marker between your digits. If the rider is wearing ankle socks you may need to pull them higher, or try to push them down. Whatever is required to give the marker good contact in the correct position.
Knee: Distal Femoral Lateral Epicondyle
Ask the rider to set the cranks in the horizontal position, with the near foot forward.
Palpate just below and behind the Patella (kneecap) to find the gap between Femur and Tibia. Then palpate from the back of the knee to find the rear of that junction.
Place the marker centred on the bone between your finger and thumb.
Hip: Greater Trochanter
With the riders leg in extended position palpate to identify femoral head. If it is not clear where the bone is (common for all but the leanest riders) you may find that asking them to pedal backwards slowly causes the bone to pop out more clearly. A useful technique for finding a starting point can be to ask the rider to sit up off the bars and place their hand on the side of their hip. With the heel of the hand at the top of their pelvis - the middle finger should extend to just over the greater trochanter.
(Note: some types of lycra are particularly difficult to stick to. If you are having issues it can be worth using Kinesio tape to provide a larger base for the marker. Also, riders will often wave their hands past their hips when off the bike - it can be worth asking the rider to hold their hand on this marker when they sit down off the bike so they are aware of the risk)
Shoulder: Greater Tuberosity of the Humeral head
(Not on the Acromion Process as in other systems.)
With the rider sitting on the hoods locate the acromion process (end of clavicle) then move down roughly 3cm (1 inch) to find the head of the Humerus When choosing the location, be sure to orient the marker such that it faces the Kinect as much as possible.
Elbow: Lateral Epicondyle
For Road and Mountain: Palpate the riders elbow to find the end point of the Humerus. You may need to carefully choose where to place the marker to avoid having it folded over by the indent in the elbow.
For a triathlon position the elbow will be more bent, requiring the marker to be placed a little further up the Humerus. If the rider has particularly tall armrests you may need to position the marker a little higher.
Wrist: Centre of the Distal Radioulnar joint
For Road Place the dot in the centre of the bones at the top of the wrist. if the rider tends to twist their wrists you may need to place the marker slightly off centre to orient towards the Kinect. Or place the Kinect further towards the front of the bike MTB – the marker will need on be on the head of the Ulna – to the outside of the wrist so it is facing the camera For Triathlon you will also need to look out for the rider twisting their wrists, in general the centre of wrist location is the standard
Video
This video illustrates the process of attaching each marker.
Related Articles
Troubleshooting marker detection
Velogic Studio should be giving you a solid wireframe/skeleton: ... and the Quality Indicators should be showing "Good" for detection. If you're not getting that, this page will help you troubleshoot. Look for red dots - any extra? Any missing? If ...Configuring Orbbec Femto Mega camera
During the installation session, our technician will have installed the Velogic FrameBlaster software onto your Orbbec Femto Mega camera, and added the camera to Velogic Studio. Step 1 of Velogic Studio will show a card for the camera, and you can ...Ankle Flexion metrics and visualization
Historical: Ankle Angle metrics Historically, Velogic Studio used 7 markers: wrist, elbow, shoulder, hip, knee, ankle, and toe. From those 7 markers, a range of metrics were calculated; for the foot, this was mainly "Ankle Angle" which is a simple ...Upgrading from Kinect to a single Femto Mega camera
If you're a Velogic Studio Essentials user who started with a Kinect camera, but you want to upgrade to an Orbbec Femto Mega camera - this page is for you. Stage 1: Gather hardware PC meeting minimum specs You should already have a computer meeting ...Velogic Studio Pro (Femto Mega) - Purchasing FAQ
This page will answer all your questions about the hardware required for Velogic Studio Pro with one or more Orbbec Femto Mega cameras: Are you in the right place? Essentials vs Pro Velogic Studio is available in 2 product variants: Velogic Studio ...