Configuring Orbbec Femto Mega camera
During the installation session, our technician will have installed the Velogic FrameBlaster software onto your Orbbec Femto Mega camera, and added the camera to Velogic Studio.
Step 1 of Velogic Studio will show a card for the camera, and you can use that card to configure the camera to work best in your studio.
On the right of the card are the settings for the camera:
Placement is either Lateral (for a camera placed to the side of a rider) or Frontal (to use the Aero module - only available with a Pro subscription)
Orientation allows you to rotate the camera on its mount; this is mostly useful for Aero, where the camera should be mounted in a portrait orientation (because the frontal view of the rider is naturally taller and thinner, which fits the aspect ratio of a camera when mounted rotated 90 degrees). This option is less useful for lateral cameras, because the view area is constrained to be square anyway.
Capture knee track allows you to choose whether the knee track is calculated and displayed on the live view.
Include skeleton on report image allows you to choose whether you wish the lateral images in the report to have the blue skeleton drawn on them.0
Create 3D view option does additional processing to produce a 3D view option. This gives you a "3D" selector on the liveview in step 2, useful for showing customers what the camera is seeing in 3D. If you turn this on, check that your frame rate is still good, and that your CPU usage isn't too high.
Use depth filter option will use the depth information from the camera to de-emphasize the background of the scene. This can be useful if you have a very busy/distracting background.
Joint markers: use Eight joint markers to get advanced ankling metrics (see also: Joint marker placement)
Image settings
Click + to expand the image settings section:
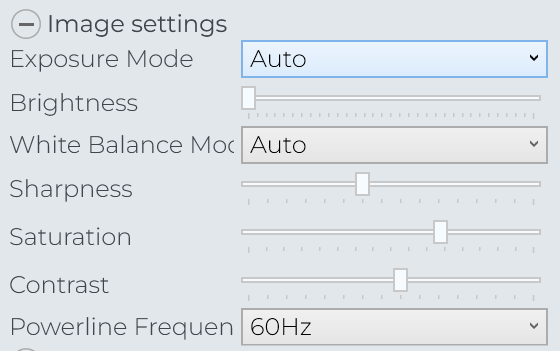
Exposure mode is either Auto (allow the camera to select appropriate exposure) or Manual. If you have good lighting, you can leave this at Auto; if you have poor lighting, you may want to set this so Manual and fine-tune it. Low exposure = low motion blur on the colour image; the best way to get low exposure is with good lighting and Auto exposure, but if you set to Manual you can explicitly reduce the exposure time, and compensate for the darker image by turning up the brightness. There's no free lunch though: the image will be grainy.
White balance, sharpness, saturation, contrast: all as per normal videography.
Powerline Frequency: Set this to match the powerline frequency in your country, to reduce the flicker in the image.
Sync settings
The Sync mode defines how the camera participates in the Sync system, which ensures that the laser from one camera doesn't interfere with the sensors in another camera.
For more information on the sync system, see Self-install procedure for Orbbec Femto Mega cameras
About
The About panel gives information about the version of different camera-related components:
FrameBlaster shows the version of the Velogic FrameBlaster software installed onto the camera. If you see an "Update" link next to this version number, you can click it to update the FrameBlaster version from Velogic Studio. For information on what's new, see Release notes: FrameBlaster
Firmware shows the version of the firmware that the device shipped with. We can't currently update this from Velogic Studio.
Hardware shows the version of the camera hardware.
Quality Indicators
These show your frame rate (should always be "Good") and detection (should be "Good" if you have a rider with joint markers in view of the camera)
See also: Lighting & environment
Deactivate and Remove buttons
Deactivate will temporarily disconnect the camera from Velogic Studio, but still remember it's there. You can reactivate it once deactivated by clicking Activate. This is useful if you don't want to use every camera for every fit.
Remove will remove the camera completely from Velogic Studio.
Related Articles
Troubleshooting Orbbec Femto Mega camera
Velogic Studio Essentials and Velogic Studio Pro can utilize the Femto Mega camera from Orbbec, which looks like this: You can think of this camera as a miniaturized version of the Kinect, with an on-board CPU. It is connected to your PC via an ...Self-install procedure for Orbbec Femto Mega cameras
This procedure is an alternative to booking an installation session, if you prefer to do-it-yourself. We would prefer to complete the installation session ourselves (remotely), so that we can verify you have a working installation - but if you ...Upgrading from Kinect to a single Femto Mega camera
If you're a Velogic Studio Essentials user who started with a Kinect camera, but you want to upgrade to an Orbbec Femto Mega camera - this page is for you. Stage 1: Gather hardware PC meeting minimum specs You should already have a computer meeting ...Velogic Studio Pro (Femto Mega) - Purchasing FAQ
This page will answer all your questions about the hardware required for Velogic Studio Pro with one or more Orbbec Femto Mega cameras: Are you in the right place? Essentials vs Pro Velogic Studio is available in 2 product variants: Velogic Studio ...Recommended computers for Velogic Studio Pro (Femto Mega cameras)
We are often asked whether a particular computer is likely to work with the newer Femto Mega cameras. You should check our PC System Requirements and Compatibility Guide (velogicfit.com) , but this page lists some particular models that are known to ...